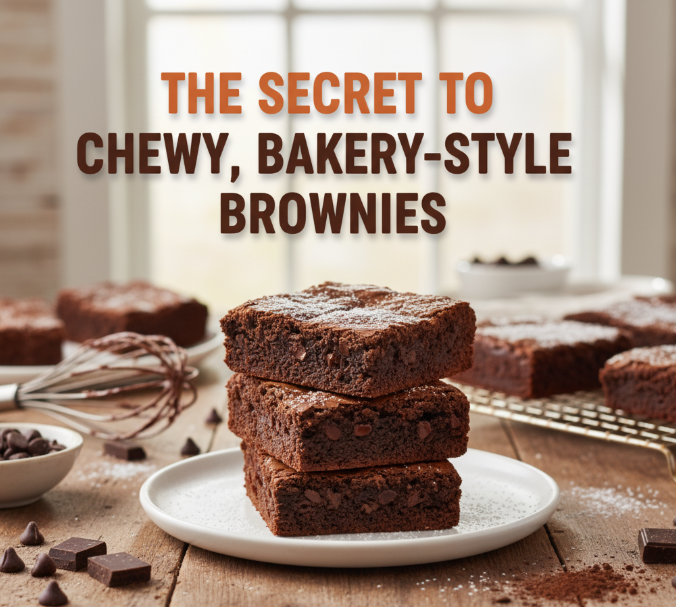
Ever sunk your teeth into a bakery brownie and wondered why it tastes so much better than the ones you make at home? That chewy, fudgy texture, that shiny crackly crust and the rich chocolate flavor just seems like it would be impossible to achieve at home. But here’s the good news: those bakery-style brownies aren’t magic, and you don’t need professional equipment to make them.
The trick to achieving that perfect chewy, fudgy texture is knowing a few principles that most home bakers ignore. From the type of sugar you use to how long you beat your batter, every step counts. In this guide, you’ll learn exactly what makes brownies chewy instead of cakey, and how to re-create that bakery quality at home.
Whether you are making them for a special event, or simply craving that perfect chocolate treat, you will take your brownies from average to extraordinary with these methods. So let’s dig into the secrets professional bakers rely on day in and out.
Why Are Some Brownies Chewy and Fudgy While Others Have a Cake-Like Texture?
Chewy vs. Cakey Brownies: The distinction between chewy and cakey brownies centers around ingredient ratios and the way they interact during baking. Think of it like building with various materials — some will provide for dense, concentrated structure and others light and airy.
The fat content is the most significant. Brownies with more butter or oil than flour will be chewier and denser. That fat coats the particles of flour, preventing too much gluten from developing. It’s the gluten that gives bread its chewy, stretchy quality but in brownies too much can mean cake instead of moist fudgy bite you’re after.
Sugar type is another game-changer. Brown sugar has molasses in it, making the dough generally more moist and chewier. Brownies that are lighter and more crackly on top come up with white sugar. Which is the best when it comes to bakery brownies?
Eggs are tricky—sometimes, they can swing one way or the other. Whole eggs enrich and serve to bind everything. More egg yolks (the yellow part) and less whites make a denser, fudgier brownie. You’re adding air and structure thanks to the egg whites, and you’re tipping that brownie balance toward cake.
Here is what happens, depending on the ratio:
| Ratio of Ingredients | Result in Texture |
|---|---|
| High fat, low flour | Fudgy brownies – Very dense, almost truffle like |
| Just the right amount of fat & flour | Chewy brownies – Densely chewy but not too sticky, just right |
| More flour, less fat | Cake-like brownies – Fluffy and cakey |
| Extra chocolate/cocoa | Intense fudge – Rich will melt in your mouth |
Contribution of Chocolate to Texture
Not all chocolate is created equal in the brownie baking department. For it’s the type of chocolate you use that has a direct effect on taste and texture, and this is where lots of home bakers slip up.
Unsweetened chocolate (pure cocoa solids and cocoa butter with nothing added) This is going to give you the most intense chocolate flavor and the most control over sweetness. Professional bakers prefer this one because it makes a denser, more sophisticated brownie.
Types of cocoa powder: There are 2 types of cocoa powders: natural or Dutch processed. Natural cocoa powder is acidic with a bitter, fruity chocolate flavor. Dutch-processed cocoa has been processed to make it neutral, so it ends up with a richer flavor and even color. Dutch-processed cocoa results in a richer, more bakery-like texture for chewy brownies like these.
The difference between chocolate chips and chopped chocolate is seemingly small, but it’s important. Chocolate chips are designed to keep their shape while baking, so they actually hold their texture in the batter a little better. Chopped chocolate from a bar will melt more readily, forming pockets of gooey chocolate throughout your brownies. That is what gives bakery brownies that delicious melty spot.
The best approach? Use a combination. Melt some good chocolate into your batter for richness, and then fold in chips or chunks of chocolate at the end for texture. This double-chocolate technique is what distinguishes homemade brownies from professional brownies.
Brown Sugar: Your Chewy Texture Secret Weapon
Brown sugar is by far the most crucial ingredient for that chewy bakery style texture. While a lot of recipes use just white sugar, the professional bakers know it’s brown sugar that’s the unsung hero.
Why brown sugar works so well: It includes molasses, a syrupy byproduct of the sugar cane refining process. This molasses does three significant things:
Keeps moisture in – The molasses that naturally occurs in brown sugar is hygroscopic, which means it attracts and retains water. Your brownies will stay moist for days instead of only being moist overnight.
Makes chewy – The additional moisture and acidity in molasses affects how gluten forms in your batter. This makes for a denser, chewier crumb instead of light and fluffy.
Deepens flavor – There’s also a slight caramel note brown sugar brings that creates depth and richness to your brownies, so it tastes like it came out of an expensive bakery.
Light and dark brown sugar: Light brown sugar consists of about 3.5 percent molasses; dark brown sugar contains about 6.5 percent. For the most fudge-like brownies, dark brown sugar is best. But light brown sugar works great too, if that’s what you have!
The winning ratio for chewy brownies is 60 percent brown sugar to 40 percent white sugar. The white sugar contributes to that shiny, crackly top layer we all want when we bite into a homemade brownie while the brown sugar carries most of the load for texture.
Pro tip: If your brown sugar has turned into a brick, stick the whole block in a bowl with a damp paper towel over it, and microwave for 20 to 30 seconds. It’ll soften right up.
The Perfect Butter-to-Flour Ratio
And pulling off the right ratio of butter to flour seems akin to seeking a point of equilibrium on a seesaw. Too much flour, and your brownies might end up cakey and dry. The latter will be too rich to enjoy if filled too much with butter, the former greasy. The sweet spot yields brownies that are fudgy, chewy and just the right amount of moist.
The golden ratio for fudgy, bakery-style brownies is more like 1 cup of butter to 1 cup of flour. This high fat-to-flour ratio is the key to brownies’ dense, fudgy texture. Then compare this to cake recipes, which generally contain a similar amount of flour but only about ½ cup of butter, or 2–3 times less fat per cup of flour.
Here’s the effect of various ratios on your results:
| Butter | Flour | Outcome |
|---|---|---|
| 1 cup | ¾ cup | Super fudgy, almost truffle texture, really rich |
| 1 cup | 1 cup | Perfect chewiness, cafe-like brownie |
| 1 cup | 1½ cups | Bit cakey but moist still |
| ½ cup | 1½ cups | SUPER cakiness territories |
Melted versus softened butter makes a huge difference, too. Brownies made with melted butter will be slightly more dense because the sugar gets mixed in so well (not much air is incorporated). That is exactly what you want for chewy brownies. Creaming together butter with softened (but still solid) chunks of the stuff creates little pockets of air that will yield a fluffier, cakier texture.
Temperature matters too. Once you’ve melted your butter, allow the pan to sit for about 5 minutes to cool before adding it to your eggs and sugar. If the heat is too intense, it can begin to cook the eggs, resulting in a strange texture. You’re looking for it to be warm enough to dissolve the sugar without being so hot that anything scrambles.
One more little trick: Add a tablespoon of oil (vegetable or coconut) to your melted butter. This makes your brownies stay moist even longer as oil remains liquid at room temperature, and butter can firm back up and make your brownies a little drier as they cool.
Eggs: The Binding Magic
There’s a lot of heavy lifting for eggs to do in brownie batter, but when you understand what they’re doing, you can control the texture of your finished product. Every part of the egg does something different for your brownies.
Richness resides in egg yolks. They are roughly 50 percent fat and contain lecithin, which is an emulsifier (it helps the fat and water in your recipe play nice). The more yolks, the richer, denser and chewier they will be. This is one reason some bakery recipes ask you to use more yolks.
Egg whites are about 90 percent water and 10 percent protein. Whipped, they have the power to hold air and yield something that is more spongy. Great for cakes, not so great for chewy brownies. Too many egg whites, or overwhipping them, can turn your brownies cakey instead of fudgy.
The perfect egg ratio for chewy brownies is typically three whole eggs and one extra yolk. That’s all the structure you need to keep your brownies from falling apart, and a perfect balance for that rich dense texture.
The reason you want the eggs at room temperature is that they will incorporate more easily into your batter and result in a smoother texture. When cold eggs meet hot melted butter, they can cause the butter to seize up in little clumps. If you lost track of your eggs in the fridge, don’t worry: Just sit them in a bowl of warm water for 5 minutes.
How to add eggs properly: Add them one at a time, and make sure they’re completely incorporated before adding the next. It also aids in achieving a smooth, emulsified batter. Once the eggs are in, don’t over-beat — you just want to mix until all of it is combined. Over-mixing creates gluten and adds air to the mixture, both counterproductive to chewy finished brownies.
Mixing Methods That Actually Matter
How you combine brownie batter impacts the finished texture as much as what ingredients are included. This is where many home bakers get it wrong without knowing why.
Most people are more familiar with the creaming method for cakes. You beat the sugar and softened butter together until light and airy, then add eggs, then flour. This includes lots of air, which doesn’t play nicely with chewy brownies. Don’t use this method if you like bakery brownies.
This is the melting method, which professional bakers use for fudgy brownies. You melt the butter with chocolate, cool it slightly and then whip in sugar and eggs; you finish by gently folding in the flour. This method prevents air bubbles from getting trapped in the dough, which gives it that dense, chewy texture.
This is how to do it the right way:
- Melt butter and chocolate – In the microwave in bursts of 30 seconds or in a bowl over simmering water. Stir until completely smooth.
- Let it cool for 5 minutes – This is so your eggs don’t scramble when you pour them in.
- Pour in sugar – Add white and brown sugar, whisk to combine. The mixture should appear a bit glossy.
- Add the eggs, one at a time – Stir each egg in well before you add the next. The batter will thicken and shine.
- Stir dry ingredients into the chocolate mixture – Add flour, cocoa powder, and salt at one time. Fold in, scraping from the bottom and turning over on itself with a spatula. Stop as soon as you no longer see any streaks of flour.
Don’t overmix the flour! This is crucial. When wet flour is stirred, gluten forms. The more you mix, the more gluten develops, and gluten toughens brownies and makes them cakey. Mix only until the flour is no longer visible—this will typically take 30-40 gentle folds with your spatula.
Other recipes instruct you to beat the batter for 1-2 minutes after adding flour. If you desire nice sticky brownies, don’t do this. They make cakey brownies that way on purpose.
Baking Temperature and Time Tricks
How you bake your brownies can make or break all of the work you’ve done with ingredients and mixing. This is an area where home bakers can up their game big time.
Lower temperature = chewier brownies. So many brownie recipes set the oven’s temperature to 350 degrees, but bakery-style chewy brownies often fare better at 325 degrees. The lower temperature of the oven encourages them to bake more slowly and evenly, which will ultimately create that soft, dense crumb without overcooking or drying out the edges.
Here’s why pan choice matters more than you might realize. Metal pans conduct heat better and produce crisper edges, while glass or ceramic pans bake more slowly and softly. For the chewiest brownies, take them out of the oven when they are still a little undercooked. The darker the pan, the more heat it retains — meaning you’ll want to lower your oven temperature by 25°F if using a dark nonstick pan.
Pan size is critical. Most brownie recipes are written for a 9×9-inch pan. Use a different size, and you’ll alter the thickness of your brownies, an element that makes a considerable impact on baking time:
| Pan Size | Brownie Thickness | Baking Time Adjustment |
|---|---|---|
| 8×8 inches | Thicker | Add 5-10 minutes to time |
| 9×9 inches | Standard | Recipe will be the standard |
| 9×13 inches | Thinner | Remove 5-8 minutes from time |
The toothpick test is a liar. Many recipes suggest that brownies are finished when a toothpick comes out with only a few moist crumbs. For chewy, bakery-style brownies? You want to remove them when the toothpick comes out with some wet batter on it — not just crumbs. The center should seem just a bit underbaked. It will keep cooking as it cools (this is called carryover cooking), and you’ll have perfectly fudgy, chewy brownies.
Visual cues to look for:
- The edges will be set and beginning to pull away from the pan a little
- It should look set on top with a very slight jiggle when you gently shake the pan
- There should be that signature shiny, crackly top
Cooling is part of baking. Allow your brownies to cool in their pan for at least 30 minutes, ideally an hour. They need this time to set up in the right way. That’s because if you slice them before they’re cool enough, your end result will be a pool of molten sugar pooling on the work surface (not bad in itself; not at all that perfect bakery texture).
To achieve that delightful chewiness, refrigerate your brownies for 2 to 3 hours once they’ve cooled to room temperature and then bring them back up to room temperature before serving. This sounds strange, but it does something magical to the texture.
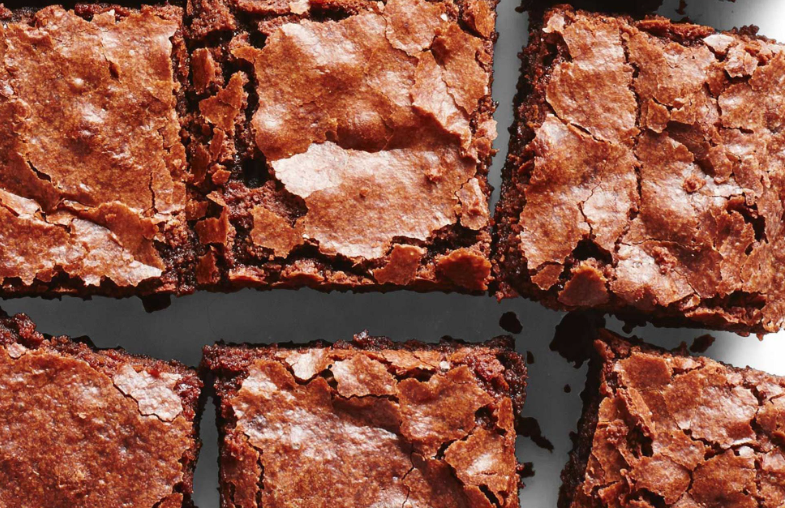
That Shiny, Crackly Top Layer
But the most distinctive thing about bakery-style brownies is that beautiful shiny, crackly top. It looks impressive, and it contributes a lovely, contrasting touch of delicate crispiness to the fudgy interior. Here’s how to have it every time.
The science of it: All that glistening on top is sugar syrup. When you beat together the eggs and sugar, you’re dissolving sugar into the eggs. As they bake, some of this sugar solution rises to the top and dries out, forming that papery, crackly crust.
This is something that only white sugar can bring. Brown sugar, however, won’t have the shine because molasses gets in the way of sugar crystals forming. That is why the best recipes call for a mix — brown sugar for chew, white sugar for that crackly top.
Proper mixing creates the crust. Once you incorporate your eggs into the cooled chocolate-butter, whisk vigorously for 60-90 seconds. It should be thick, shiny and pale. This is the point at which you’re making that sugar solution, which is going to turn into your glossy top. Don’t skip or hurry this step.
Temperature plays a role too. Another option is starting with an oven that’s hotter for the first 10 minutes before lowering it slightly (350 degrees is ideal, then turn the heat down to 325), which helps that top layer of your brownie set right off the bat and encourages more cracks and shine.
Do not open the oven door during first 20 minutes of baking. The fluctuation in temperature can cause the top to crack the wrong way or prevent the shiny layer from forming as it should.
If your brownies keep emerging without that crackly top, these are some solutions to try:
- Use a bit more white sugar
- Beat the eggs and sugar more
- Ensure that your oven is completely preheated
- Bake on the middle rack, not the bottom
The Secret to Chewy, Bakery-Style Brownies
Add-ins Without Ruining Texture
Add-ins can elevate your brownies, but only if you get them right. There are a few rules to maintain the chewy flavor and texture of a good brownie.
Chocolate chips or chunks are your best bet. They melt into pockets of deliciousness without altering the batter’s structure. You’ll need maybe ½ to ¾ cup for a standard 9×9 pan. Stir them in gently at the very end after your flour is blended.
Nuts lend crunch and flavor but can dry out your brownies if you get carried away. Stick with ½ cup of chopped walnuts or pecans, and toast them a bit first to develop their flavor. Toasting also creates a crunch that provides a good counterpoint to the fudgy brownie.
Swirls and ribbons, such as caramel, peanut butter or cream cheese, have to be inserted in a strategic manner. Pour half the batter into pan, scatter dollops of swirl ingredient, gently smooth remaining batter over them and swirl with a knife. If you over swirl, it will just turn into their flavor instead of a separate ribbon.
Brownies can become soggy from things that introduce moisture (like fruit). If you do decide to add raspberries or cherries, use a light hand and nestle them gently after the batter is transferred to the pan without stirring them in.
Flakes of salt on top are a little bakery secret that help chocolate taste even more chocolatey. Sprinkle flaky sea salt over the batter just before baking. It makes the chocolate flavor pop and adds a little refinement.
Maximum add-in rule: No more than 1 cup total of extras. Go more than that, and you’ll be messing with the recipe too much, and your texture will suffer.
Storage Tips for Maximum Chewiness
You’ve baked the perfect chewy brownies — now you need to keep them that way. How you store them makes the difference between brownies that stay fudgy for a week and those that are leathery and dry by day two.
Room temperature is best for brownies you plan to eat in 3-4 days. Once they are completely cool, store them in an airtight container. Here is the key: Just place a piece of bread with your brownies. The bread gets stale, but releases moisture which is absorbed by the brownies, keeping their texture perfectly chewy. Change the bread out every two days.
Refrigeration is tricky. It can dry them out, the cold air drawing the moisture out. If refrigerating them is a must, wrap them snugly in plastic wrap and place in an airtight container. Let them come to room temperature before eating — cold brownies are never very exciting.
Freezing: Brownies freeze very well for long-term storage. Wrap each brownie or entire uncut square with plastic wrap and then wrap again in aluminum foil. They can be stored, wrapped in foil, for up to 3 months. Unwrap and set them out at room temperature for a few hours to thaw. Pro tip: Frozen brownies are amazing eaten slightly frozen (think the way fudge tastes when it’s just barely thawed).
Reheating brings back magic. Warm up a brownie in the microwave for 10 to 15 seconds so it feels fresh-baked. The chocolate becomes a little bit melty and the texture softens so nicely.
How long brownies last:
- Room temperature (airtight): 4-5 days
- Refrigerated: 1 week
- Frozen: 3 months
Indications your brownies are spoiled:
- Hard, crusty edges
- Moisture/mold (if kept in damp places)
- Off smell or taste
The relatively higher fat content in brownies means that they can stay fresh at least as long, or longer than regular cake, and properly stored brownies will retain that tender chewiness for several days.
Common Mistakes That Kill Chewiness
Even with the perfect recipe, there are mistakes to be made that can throw off your brownies. Here are the frequent issues and how to work around them.
Mistake #1: Using all white sugar. That means brownies that are crisp and cakey rather than chewy. Always add brown sugar — no ifs, ands or buts about it if you want that bakery texture.
Mistake #2: Overmixing once you’ve added the flour. This is the #1 enemy of perfect fudgy brownies. Mix until you no longer see flour, then stop. Every additional stir creates more gluten, and traps more air.
Mistake #3: Overbaking. Brownies cook further as they cool. If you wait until they’re all done, they’ll be overdone by the time they cool. Remove them when they still look a little underdone in the middle.
Mistake #4: Wrong pan size. The brownies are much too thin and crispy if you use a larger pan. A smaller pan results in thick brownies and disrupts the baking time. Keep your pan size the same as listed in your recipe.
Mistake #5: Not cooling the butter. Hot melted butter combined with eggs can cook the eggs and make them grainy. Cool for 5 minutes, until it is warm to the touch but not hot.
Mistake #6: Skipping the salt. The salt isn’t just salty; it’s boosting the flavor and balancing sweetness. Even a ¼ teaspoon can have a big impact.
Mistake #7: Cutting too soon. Brownies are especially enticing when they’re warm, but cutting into them before they cool completely results in crumbly, messy pieces. Let them rest at least 30 minutes, and better yet an hour.
Mistake #8: Using low-quality chocolate. Cheap chocolate has way too much wax and not enough cocoa butter, altering not only the flavor but also the texture. You don’t need expensive chocolate, but don’t go super cheap.
Mistake #9: Not using enough chocolate. Some recipes contain too much flour and too little chocolate. Real bakery brownies use a lot more chocolate than you might think — often at least twice as many ounces of unsweetened chocolate or dark chocolate as there are sticks of butter (and sometimes more), plus cocoa powder besides.
Mistake #10: Substituting ingredients randomly. Swapping butter for oil, all-purpose flour for other flours, or moving between different kinds of sugar without knowing how they work: It’s an experiment that can yield unpredictable results.
The Ultimate Bakery-Style Brownie Recipe
Now that all the secrets are revealed, here’s a tried-and-true recipe that puts everything we’ve discussed to good use. These are the chewiest, most bakery-style brownies you’ve ever had.
Ingredients:
- 1 cup (2 sticks) unsalted butter
- 6 oz dark chocolate (60-70% cocoa), chopped
- ¾ cup white sugar
- ¾ cup packed dark brown sugar
- 3 large eggs and 1 egg yolk, at room temperature
- 2 teaspoons vanilla extract
- ¾ cup all-purpose flour
- ½ cup unsweetened Dutch-processed cocoa powder
- ½ teaspoon salt
- ¾ cup chocolate chips or chunks (optional)
- Flaky sea salt, for topping (optional)
Instructions:
- Pre-heat your oven to 325°F (165°C). Line a 9×9-inch metal baking pan with parchment paper so that it overhangs on two sides.
- Melt butter and chopped chocolate together in a heatproof bowl set over simmering water, or in the microwave at 30-second intervals. Stir until completely smooth. Let cool for 5 minutes.
- Whisk both sugars into the chocolate mixture until incorporated and shiny.
- Add eggs and egg yolk one at a time, beating well (60-90 seconds) after each addition. The mixture will be thick and shiny. Add vanilla and whisk again.
- In another bowl, combine flour, cocoa and salt.
- Transfer the dry ingredients to the chocolate mixture in one go. Use a spatula to gently fold the mixture until no traces of flour remain, about 30-40 folds. Don’t overmix.
- If using, fold in chocolate chips.
- Transfer batter to the prepared pan and smooth out. If desired, sprinkle with sea salt.
- Bake for 35-40 minutes until edges are set and the center jiggles softly when you lightly shake the pan. A toothpick inserted into the middle should have not only moist crumbs on it but wet batter.
- Cool in the pan for at least 1 hour, then lift out using the parchment overhang and cut into squares.
- For an even chewier texture, refrigerate for 2-3 hours after cooling. Bring to room temperature when ready to serve.
Frequently Asked Questions
How come my brownies are cakey not fudgy?
Chances are, you’re using too much flour, not enough fat or are overmixing your batter. Be sure you’re measuring the flour properly (spoon it into the measuring cup and level it off — do not pack). Double-check as well that you’re using enough brown sugar and not overbeating once you add the flour.
Can I substitute oil for butter?
Yes — but your brownies will be different. Oil contributes fudginess and moistness with less flavor, but butter brings rich, caramel undertones and browning that oil cannot compete with. Opt for a blend of 75% butter and 25% oil.
How come my brownies didn’t get a shiny top?
The shiny crackly top is the result of dissolving sugar well into the eggs. Just be sure you beat the eggs and sugar really well for 60 to 90 seconds, until they’re thick and glossy. Also: use plenty of white sugar — brown alone won’t get you there.
How can I tell when brownies are done?
For chewy brownies, they’re ready when the edges are set and just barely pulling away from the pan, but the center still jiggles slightly when you shake the pan. A toothpick ought to have some wet batter on it, not just crumbs. Keep in mind, they’ll continue to cook as they cool.
Is it possible to make brownies without eggs?
The eggs are a key source of structure and texture in brownies. You could use egg substitutes, such as flax eggs or commercial egg replacers, though the texture would not be entirely similar. Each egg can be replaced with 1 tablespoon ground flaxseed mixed with 3 tablespoons water (let the mixture sit for 5 minutes).
Why are my brownies dry?
Overbaking is the main culprit. Plus, using all white sugar instead of brown sugar or not using enough butter can make brownies dry. Be careful not to make substitutions without understanding the recipe.
Is it ok for brownies to be gooey in the middle?
Chewy brownies are moist and fudgy, but not gooey or liquid. If they’re so gooey that they fall apart, they’re still underbaked. The ideal texture: dense and fudgy but not falling apart when sliced.
Is it possible to double brownie recipe?
Yes, but use a 9×13-inch pan or two 9×9-inch pans. Don’t attempt to double the batch in one 9×9 pan — they’ll be too thick and won’t bake evenly. Bake them 5-8 minutes less than the original recipe since they will be thinner.
What is the best chocolate to use?
For brownies, use 60-70% cacao chocolate. You get the full taste of chocolate without it being too bitter. Ghirardelli, Guittard or even Trader Joe’s chocolate will work great. Skip the chocolate chip form — use baking bars instead.
What is the best way to cut brownies?
Use a sharp knife, wiping it off between cuts. For the neatest squares, refrigerate brownies for an hour to firm up before cutting, then bring them back to room temperature before serving. You can also rinse the knife under hot water, dry it and cut — a warm knife cuts more easily.

Your Next Batch is Within Reach
Bakery-style chewy brownies aren’t created by a complicated recipe or expensive tools. It’s not about one special secret ingredient; it’s about understanding how ingredients interact and what mistakes get repeated, leading to cakey or dry or boring brownies.
The main points are simple: opt for brown sugar instead of all white to up the chewy factor; don’t overmix your batter (or you’ll beat that desired chewiness right out), and bake at a slightly lower temperature, pulling them out when they still appear slightly underdone. Just those three rules alone will transform your brownies.
Begin with the recipe I’ve included above, which uses all the techniques we’ve learned. Once you have a grip on the basic method, try different add-ins, vary sweetness levels or experiment with chocolate intensity. But nail the fundamentals first.
Keep in mind that baking is a science some of the time but very much an art the rest, and lots of practice will help refine your skills. Your first attempt may not be ideal, but with every round of baking, you develop a better feel for the signs — how a batter is supposed to look, when to stop mixing that batter or precisely when those brownies are done. Trust the process and you’ll soon be turning out brownies that rival the best bakery in town.
Now, go grab your mixing bowl and start baking. That perfect batch of chewy, fudgy, bakery-style brownies is calling your name.

PH365 Online Casino – sounds promising! Is this the place to catch some heat and win some dough? Gotta check out the slot selection first! ph365onlinecasino
Needed a reliable site while traveling, and bong88comvn came through. Easy to use on mobile, and the connection was always stable. Two thumbs up! bong88comvn
Just hopped on 10brl. Seems legit! Navigation is pretty straightforward. Give it a look-see and let me know what you think. 10brl
Mgamebet07… never heard of ’em! But hey, gotta stay open-minded, right? Could be a hidden gem. I’ll have a peek, report back if I find anything worthwhile. mgamebet07
canadian pharmacy world
canadian pharmacies recommended by aarp
buy meds online
online pharmacies in usa
recommended canadian online pharmacies
pharmacy in canada
internet down [url=https://caiu.site/]caiu.site[/url] .
Discord down [url=https://caiu.site/]caiu.site[/url] .
canada pharmacy estrogen without prescription
джой казино регистрация [url=https://t.me/joy_casino_news/]t.me/joy_casino_news[/url] .
заказать кухню стоимость [url=https://zakazat-kuhnyu-4.ru/]zakazat-kuhnyu-4.ru[/url] .
заказать кухню с замером [url=https://zakazat-kuhnyu-4.ru/]zakazat-kuhnyu-4.ru[/url] .
заказать кухню под заказ [url=https://zakazat-kuhnyu-4.ru/]заказать кухню под заказ[/url] .
онлайн школа с 1 по 11 класс [url=https://shkola-onlajn-33.ru/]онлайн школа с 1 по 11 класс[/url] .
закрытые школы в россии [url=https://shkola-onlajn-33.ru/]закрытые школы в россии[/url] .
мелбет ios [url=https://mobilemelbet.ru/]мелбет ios[/url] .
школа для детей [url=https://shkola-onlajn-33.ru/]школа для детей[/url] .
онлайн ш [url=https://shkola-onlajn-33.ru/]онлайн ш[/url] .
дистанционное обучение 11 класс [url=https://shkola-onlajn-33.ru/]shkola-onlajn-33.ru[/url] .
WhatsApp caiu [url=https://caiu.site/]WhatsApp caiu[/url] .
99 down [url=https://caiu.site/]caiu.site[/url] .
YouTube down [url=https://caiu.site/]caiu.site[/url] .
mexican pharmacy online medications
вывод из запоя в ростове на дону на дому [url=https://vyvod-iz-zapoya-v-rostove-3.ru/]вывод из запоя в ростове на дону на дому[/url] .
вывод из запоя на дому в ростове [url=https://vyvod-iz-zapoya-v-rostove-3.ru/]вывод из запоя на дому в ростове[/url] .
написание курсовых на заказ [url=https://kupit-kursovuyu-84.ru/]написание курсовых на заказ[/url] .
студенческие работы на заказ [url=https://kupit-kursovuyu-84.ru/]студенческие работы на заказ[/url] .
заказать курсовой проект [url=https://kupit-kursovuyu-84.ru/]заказать курсовой проект[/url] .
оптимизация и seo продвижение сайтов москва [url=https://prodvizhenie-sajtov-v-moskve16.ru/]оптимизация и seo продвижение сайтов москва[/url] .
поисковое продвижение сайта в интернете москва [url=https://prodvizhenie-sajtov-v-moskve16.ru/]prodvizhenie-sajtov-v-moskve16.ru[/url] .
seo partner [url=https://prodvizhenie-sajtov-v-moskve16.ru/]prodvizhenie-sajtov-v-moskve16.ru[/url] .
сделать аудит сайта цена [url=https://prodvizhenie-sajtov-v-moskve16.ru/]prodvizhenie-sajtov-v-moskve16.ru[/url] .
усиление ссылок переходами [url=https://prodvizhenie-sajtov-v-moskve16.ru/]prodvizhenie-sajtov-v-moskve16.ru[/url] .
Вы можете выбрать игры различных жанров и форматов.
[url=https://7v4.casino/]Pinco Casino[/url]
Платформа отличается стабильной работой и высоким уровнем безопасности.
сео продвижение за процент кловер [url=https://prodvizhenie-sajtov-po-trafiku10.ru/]prodvizhenie-sajtov-po-trafiku10.ru[/url] .
лучшие seo агентства [url=https://luchshie-digital-agencstva.ru/]лучшие seo агентства[/url] .
поисковое продвижение по трафику [url=https://prodvizhenie-sajtov-po-trafiku10.ru/]поисковое продвижение по трафику[/url] .
рейтинг диджитал агентств [url=https://luchshie-digital-agencstva.ru/]рейтинг диджитал агентств[/url] .
раскрутка сайтов по трафику [url=https://prodvizhenie-sajtov-po-trafiku10.ru/]раскрутка сайтов по трафику[/url] .
seo продвижение по трафику clover [url=https://prodvizhenie-sajtov-po-trafiku11.ru/]seo продвижение по трафику clover[/url] .
современные seo кейсы [url=https://seo-kejsy17.ru/]seo-kejsy17.ru[/url] .
digital маркетинг агентства [url=https://luchshie-digital-agencstva.ru/]luchshie-digital-agencstva.ru[/url] .
seo и реклама блог [url=https://webproverka.com/index-articles.php/]seo и реклама блог[/url] .
продвижение сайта [url=http://parnasse.ru/audit-sayta-seo-kak-vyyavit-slabye-mesta-veb-resursa-i-ustranit-oshibki.html]продвижение сайта[/url] .
раскрутка сайтов интернет [url=https://prodvizhenie-sajtov-po-trafiku11.ru/]prodvizhenie-sajtov-po-trafiku11.ru[/url] .
лучшие рекламные агентства [url=https://luchshie-digital-agencstva.ru/]лучшие рекламные агентства[/url] .
блог seo агентства [url=https://webproverka.com/index-articles.php/]блог seo агентства[/url] .
сео центр [url=https://seo-kejsy17.ru/]seo-kejsy17.ru[/url] .
seo клиники наркологии [url=https://aksport.ru/catalog/raznoe/2025/seo-keys_kak_novostnoy_format_13_11_2025.php/]seo клиники наркологии[/url] .
seo продвижение рейтинг [url=https://reiting-seo-kompanii.ru/]reiting-seo-kompanii.ru[/url] .
рейтинг агентств россии [url=https://luchshie-digital-agencstva.ru/]рейтинг агентств россии[/url] .
сео продвижение сайта по трафику [url=https://prodvizhenie-sajtov-po-trafiku11.ru/]сео продвижение сайта по трафику[/url] .
статьи про seo [url=https://webproverka.com/index-articles.php/]статьи про seo[/url] .
аудит продвижения сайта [url=https://in.gallerix.ru/journal/internet/201811/zakazat-raskrutku-sayta-v-moskve-kak-vybrat-nadezhnogo-podryadchika-bez-finansovyx-riskov/]аудит продвижения сайта[/url] .
seo продвижение магазин наушников [url=https://aksport.ru/catalog/raznoe/2025/seo-keys_kak_novostnoy_format_13_11_2025.php/]seo продвижение магазин наушников[/url] .
топ агентств seo продвижения [url=https://reiting-seo-kompanii.ru/]топ агентств seo продвижения[/url] .
internet seo [url=https://lrnews.ru/press-reliz/171246-raskrytie-vozmozhnostey-prodvizheniya-veb-saytov.html]internet seo[/url] .
оптимизация и продвижение сайтов москва [url=https://ladystory.ru/?p=217760]оптимизация и продвижение сайтов москва[/url] .
seo агентство [url=http://parnasse.ru/audit-sayta-seo-kak-vyyavit-slabye-mesta-veb-resursa-i-ustranit-oshibki.html]seo агентство[/url] .
создать сайт прогнозов на спорт в москве [url=https://aksport.ru/catalog/raznoe/2025/seo-keys_kak_novostnoy_format_13_11_2025.php/]создать сайт прогнозов на спорт в москве[/url] .
рейтинг seo агентств [url=https://reiting-seo-kompanii.ru/]рейтинг seo агентств[/url] .
оптимизация и seo продвижение сайтов москва [url=https://nvdaily.ru/info/314202.html]оптимизация и seo продвижение сайтов москва[/url] .
аудит продвижения сайта [url=http://yopolis.ru/publikacii/5279-seo-prodvizhenie-v-mire-cifrovogo-biznesa.html]аудит продвижения сайта[/url] .
seo optimization ranking [url=https://reiting-seo-kompaniy.ru/]seo optimization ranking[/url] .
продвижение сайта [url=https://mateshka.ru/seo-prodvizhenie-saytov-agentstvo.html]продвижение сайта[/url] .
создать сайт прогнозов на спорт в москве [url=https://seo-kejsy17.ru/]создать сайт прогнозов на спорт в москве[/url] .
seo partners [url=https://gorodpavlodar.kz/News_110307_3.html]seo partners[/url] .
net seo [url=https://andreyex.ru/uslugi/seo-prodvizhenie-sajtov/]net seo[/url] .
глубокий комлексный аудит сайта [url=https://lesstroy.net/articles/4275/]глубокий комлексный аудит сайта[/url] .
топ агентств seo продвижения [url=https://reiting-seo-kompaniy.ru/]reiting-seo-kompaniy.ru[/url] .
раскрутка сайта франция [url=https://golubevod.net/seo-agentstvo-moskva.html]раскрутка сайта франция[/url] .
Регистрация занимает всего пару минут [url=https://cry1ngbear.ivyro.net/bbs/board.php?bo_table=7&&page=1]https://cry1ngbear.ivyro.net/bbs/board.php?bo_table=7&&page=1[/url]
рейтинг спортивных сайтов [url=https://seo-kejsy17.ru/]рейтинг спортивных сайтов[/url] .
профессиональное продвижение сайтов [url=https://svestnik.kz/raskrutka-sajtov-moskva-strategiya-vykhoda-v-konkurentnyj-segment-stolitsy/]профессиональное продвижение сайтов[/url] .
продвижение сайтов в москве [url=http://yopolis.ru/publikacii/5279-seo-prodvizhenie-v-mire-cifrovogo-biznesa.html]продвижение сайтов в москве[/url] .
частный seo оптимизатор [url=https://in.gallerix.ru/journal/internet/201811/zakazat-raskrutku-sayta-v-moskve-kak-vybrat-nadezhnogo-podryadchika-bez-finansovyx-riskov/]частный seo оптимизатор[/url] .
профессиональное продвижение сайтов [url=https://tyumen-news.net/other/2025/07/15/509294.html]профессиональное продвижение сайтов[/url] .
seo продвижение и раскрутка сайта [url=https://golubevod.net/seo-agentstvo-moskva.html]seo продвижение и раскрутка сайта[/url] .
рейтинг seo агентств [url=https://reiting-seo-kompaniy.ru/]рейтинг seo агентств[/url] .
продвижение сайта [url=https://lrnews.ru/press-reliz/171246-raskrytie-vozmozhnostey-prodvizheniya-veb-saytov.html]продвижение сайта[/url] .